Open "Disk Utility."
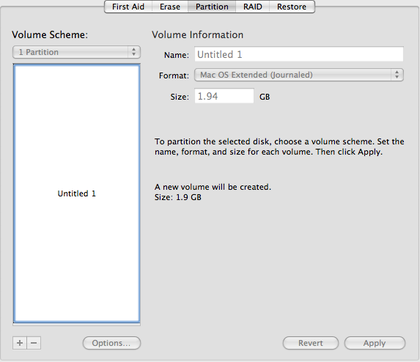
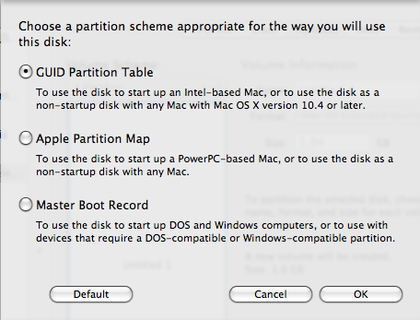
You will need to format your 8GB partition/USB drive with the GUID option so it will be bootable.


Partition about 8GB for the Leopard install on your flash drive, external hard drive, or even another partition on your main hard drive that you will be able to have connected to the computer and boot from.
I'd recommend formatting the partition as a "Mac OSX extended (Journaled)."
Under "options" (at the bottom) select "GUID." This will make the partition bootable.
Then press "Apply."


To install the .dmg file without errors....
File-›Open Disk Image... (Either from the OSX install DVD or from a .dmg file you have copied onto your hard drive/network.)
After it, your dmg file will appear on the left side of the Disk Utility's main window.
Right click (Ctrl+Click) the mounted volume (below your dmg file) of the install file
Select "Set as source..." !!! Important: Select the mounted drive as source, and NOT the dmg image!!!
After that, select the destination to be the name of the 8GB space you want to have the bootbale install file loaded onto.
And click restore.
It will ask about erasing (I recommend it, if you don't have important data on the drive, anyway it may not be boot), so click yes, if it's possible.
And it will do it.
After it, reboot, hold the Option key, select your new drive to boot, and install your system.

No comments:
Post a Comment